Wednesday, April 13, 2011

Very chocolaty chocolate cheesecake

A very belated post again. I made this chocolate cheesecake to celebrate dearest Ca's birthday. Since Ca is a chocolate lover, I thought of making her something with a chocolaty. I found this recipe from one of my favorite bloggers' website: http://lateliervi.blogspot.com and it seems pretty legit. Cheesecake is one of the easiest and yummiest cake to bake and it could never go wrong! So I baked this for her w/o having to take a first try myself. Luckily it turn out to be very delicious.


Make one 8 inches (1 ½ high) cake


Cheese mixture 300g cream cheese200ml whipping cream120g caster sugar2 whole eggs4tbs cocoa powder4tsp freshly squeeze lemon juiceCrust180g Oreo cookies (w/o filling)100g unsalted butter Prep: - Wrap the cream cheese in plastic food wrap and place in microwave on low for 2 minutes to soften it.


- Preheat oven to 160 degree C/325 degree F.


- Wrap the bottom (up to half way) of the pan with 2 layers of foil paper.


- Boil some water for later use (appx. 2 liter).


For the crust:


-Break the cookies into small pieces, then place into a zip lock bag or any heavy weight plastic bag (remove air bubbles), and crush + roll using a rolling pin until cookies become fine crumb.


-Place butter in microwave and heat for 1 mins. over medium heat.


-Pour melted butter into the bag, remove air bubble and close the bag, then shake it to mix the two.


-Pour this mix into the pan; using the back of a large spoon, press crumb firmly to pan until packed; set aside.


For the cheesecake:


-Place the cream cheese in a mixing bowl. Using a whisk, whisk cream cheese until blended; add the other ingredients in the following order, sugar --> cocoa powder --> eggs --> lemon juice --> whipping cream, make sure that each item is well blended before adding another.


-Strain the cheese mixture then pour into the cake pan.


-Pour hot water (1 inch in depth) into a roasting pan, place the pan inside the roasting pan and bake for 90minutes. If the water dried out while baking, be sure to refill with more hot water. Once the center of the cake no longer quiver and the sides begin to pull away from the pan then it is done.


-Remove from oven and let cool completely on wire rack. Place in fridge for 3 hours or overnight to set.


Dark Chocolate Glazing


-100g whipping cream125g water40g cocoa powder160g granulated sugar10g gelatin


Prep:


- Pre-soak gelatin in a bowl of cold water, squeeze out excess water; set aside. If using powdered gelatin, add 2 spoon of water.


- Using a small round cookie cutter, scrape curls off a block of white chocolate. Place whipping cream, sugar and water in a saucepan and bring to boil over medium heat. Then add in the cocoa powder and bring to boil again or till mixture slightly thicken; stir constantly to avoid mixture sticking to saucepan.


-Remove from heat and let cool for a few minutes then add the pre-soaked gelatin; stir until completely melted; strain.


-When cool to lukewarm, pour glazing onto cheesecake and let some drip down the sides. Place back into fridge for another 30 minutes.


Decorate the cake with white chocolate curls before serving.

Japanese Green Tea Red Bean Mouse Cake (日式綠茶紅豆蛋糕)


It's been a WHILE, actually a long while since my last post. It's not that I have forgotten this lovely cooking space, but rather I had been insanely busy the past 5 months! Needless to say, I took a 1.5 month vacation to Asia where I indulged myself in the shopping and food paradise. And immediately after my "luxurious" vacation, I got penalized for the crazy audit busy season! So don't be jealous, life is FAIR... Anyways, before I took off to vacation in late November, I have tried this yummy Japanese cake receipe which it immediately became my favorite cake recipe! I always believe that the combination of green tean and red bean makes the best combo and this recipe combines the best of both world. This cake is really easy to make, though it's more time-consuming... Part 1 – Sponge Cake (use 7” or 8” cake pan) Refer to Sponge/Chiffon Cake recipe


Part 2 – Cake crust (use 8 inch cake pan) Ingredients · 1 cup graham cracker crumbs · 1 Tbsp sugar · 4 Tbsp (1/2 stick) unsalted butter, melted · Pinch of ground cinnamon Procedures: 1. Preheat oven to 350 degrees F. 2. Mix together cracker crumbs, sugar and cinnamon, then add in melted butter until moist crumbs form 3. Press the cracker mixture onto the bottom of the prepared pan 4. Bake the crust until it is set and beginning to brown, about 12 minutes. Cool.


Part 3a – Red Bean Cheese Mousse Ingredients · 120g mascarpone cheese · 30g sugar · 200g red bean paste · 30g milk · 200g whipping cream · 6g (1 1/3 tsp) gelatin · 30g water Procedures: 1. Pour gelatin over water, put over double boiler to allow it to dissolve completely in the water 2. Beat whipping cream until stiff peak form 3. Beat the mascarpone cheese with a electric mixer to lighten it up then add sugar 4. Fold in milk, in two additions 5. Fold in whipping cream into cheese mixture, in 3 additions, then fold in red bean paste, gelatin mixture 6. Place a small amount of red bean cheese mixture in the center of the cake pan, then place the sponge cake in the middle to hold it in place 7. Pour all of the red bean cheese mixture into the cake pan 8. Refrigerate for at least 1 hour


Part 3b – Green Tea Mousse Ingredients · 100g whipping cream · 40g sugar · 6g (1 1/3 tsp) green tea powder · 3g (2/3 tsp) gelatin · 30g water Procedures: 1. Pour gelatin and green tea powder over the water, put into double boiler and allow them to dissolve completely into the water 2. Beat whipping cream until stiff peak, fold in green tea gelatin mixture 3. Pour green tea mixture over the refrigerated red bean cheese mousse 4. Refrigerate for at least another hour


Part 4 - 蛋糕装飾 - (可以自己随意自由發揮)


Monday, October 4, 2010

瑞士卷 (swiss roll) @@@


从小到大对瑞士卷都有一种情意结,其事真係唔知点解,觉得它们可爱到不得了。 一直都好想学做,最近終于拿起心肝学! 哈哈,致从失敗的第一次以后,我好像上了瘾似的,非要把它学会不行!

要做好的蛋卷原来不是想象的容易,首先要蛋糕底要做的鬆軟有蛋味,然后卷也要很有技巧。 话说第一次做这个蛋卷时没有把功課做好,把它低估了。 蛋糕底做的不够鬆軟而且還甜的厲害! 卷的時候又没有準備牛油纸,所以卷不成!徹底失敗!

第二次做準備功夫做好了点,換了個蛋糕底recipe,我找了很久才找到個滿意的海棉蛋糕recipe。 做出來效果错, 很鬆軟, 但就觉得不够甜. 有待改良!至于卷的技巧,我在youtube學了卷手勢,大概都拿捏到80%才做。

這次是第三次嘗試,終于都可以見人啦! 海棉蛋糕的甜度剛剛好! 今次卷了倆條,一條是纯忌廉, 另外一条是鲜士多啤梨。


食譜:


蛋糕材料: (這個是我焗雪芳蛋糕的食譜)
雞蛋: 5隻 (4隻蛋黃, 5隻蛋白), 室溫
砂糖: 3.1 tbsp
鹽: 1/8 teaspoon
麵粉: 6.3 tbsp
沙拉油: 2.5 tbsp
鮮奶: 3.5 tbsp


牛油忌廉材料
鮮忌廉 (whipping cream): 1 杯
砂糖: 1 tbsp
檸檬香油: 1 teaspoon

蛋糕做法
1. 先準備焗盆舖上牛油紙
2. 沙拉油+鮮奶攪拌混合, 加入砂糖
3. 麵粉過篩後加進1)
4. 分两次加入蛋黄 , 攪拌變蛋黃糊
5. 用另一隻攪拌盆,蛋白打至企身
6. 把蛋黃糊倒入加蛋白霜,用橡皮刀輕手以切拌方式(fold-in)攪拌至混合, 不要打圈攪拌
7. 倒入已舖上牛油紙的焗盆中
8. 入焗爐中層以 350 F 焗 15 分鐘.


牛油忌廉
鲜忌廉细砂糖打发至企身,草莓切顆

蛋糕涼後抹上鲜奶油


再放入草莓


卷的過程比較複雜和考手工, 所以我都就不寫出來. 我在youtube 找到個很好的video, 跟著做就可以啦, 我也是在那學的!


http://www.youtube.com/watch?v=5qN0whe5ZFc&playnext_from=TL&videos=bo_jEC323vY


Sunday, October 3, 2010

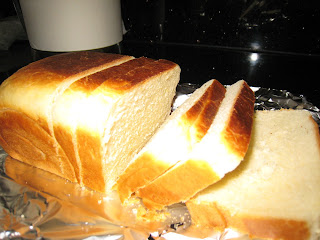
鮮奶土司 (Pain De Mie)~~~


Another one of my all time childhood favorite is 鮮奶土司, or pain de mie in french. Long wanted to try, finally have had a chance to this weekend :)


This is actually my second loaf of bread. My first loaf, a whole wheat loaf, was a failture because I forgot to let it rise for the 2nd time. As a result, the texture turned out to be really densed. This time around, I alter the recipe a little bit, cut the portion of the flour, and instead of being creative using whole wheat flour, I returned to the basic using white flour. I guess I cut too down the portion by a litle bit too much, the dough didn't fill up the entire tin. I guess the portion of flour used (250g) is not enough to fill up a 8 ½ X 4 ½ X 2 ½ tin.


Nevertheless, despite the shape, the texture of the bread is exactly what I have been looking for. It's super soft and cottony! It's tastes even as good after it cools down and I didn't have to toast it.


Ingredients:
143g fresh milk (I used 1% low-fat fresh milk)35g egg (~1 egg)25g caster sugar5g salt (~1 tsp plus ¼ tsp)250g All purpose flour4g Instant yeast (~1 tsp plus ¼ tsp)38g unsalted butter (1/2 stick)


Procedures:

In a small saucepan, gently heat the milk and water over low heat until lukewarm
Stir in the sugar, then sprinkle on the yeast and let stand for 10 minutes
Combine the flour, salt, and egg in a electric mixer (I personally used a spatula to mix instead of an electric mixer)
Make a well in the center and add the yeast mixture, mixing until incorporated
Add the butter and mix until blended
Knead for 10 minutes, either by machine or by hand on a floured work surface (I did it by hand)
Form into a ball, set in the center of a buttered bowl, cover, and let rise for 1 hour, or until approximately doubled in volume
Remove the dough from the bowl, punch out the gas, knead briefly (5 min). Divide the dough into 2 equal portion, roll and shape into balls. Let the dough rest for another 15 min
On a lightly flour surface, flatten one dough and roll out into a longish shape. Roll up the dough swiss-roll style. Do the same for the other dough
Flatten the rolled up dough and roll out again into a long rectangular shape. Roll up tightly, and make as many rolls as you can, swiss-roll style for the second time. Do the same for the other dough
Place dough in a lightly buttered bread tin. Let the dough proof for the second time (for another 30 min or until it fills up 80% of the tin). Cover with cling wrap.
Preheat the oven to 395F. Place the loaf in the center of the over, with a baking sheet over the foil to create flat top. Bake 30-35 min, or until the top of the loaf is golden and bottom sounds hollow when tapped.
Unmold the bread and cool completely on a wire rack

8 ½ X 4 ½ X 2 ½ pan


Recipe Source: from "Paris Boulangerie, Patisserie" with variations ----a gift from a friend of mine :)


Saturday, September 11, 2010

牛油皮蛋撻


上個星期第一次嘗試自己做蛋撻, 非常成功! 這個recipe 是雜合多個網上的吃譜而成的, 因為實在太好用和簡單啦, 所以一定要跟大家分享!


材料: (20 個份量)
牛油撻皮
麵粉 (all purpose): 13 oz
牛油: ½ lbs, or 2 sticks
雞蛋: 半 個
糖粉: 2 oz
蛋漿:
砂糖:4 oz
清水: 12 oz
雞蛋: 5 ½ 個
鮮奶: 5 oz
奶油: 2 oz (optional, 加了比較香)
雲呢拿油(Vanilla extract): 少許


做法
牛油撻皮:
1. 牛油要室温加雞蛋攪勻直至creamy, 加糖粉繼續攪勻
2. 加入已過篩的麵粉用手搓成麵團
3. 把麵團擀至6mm 厚 (每個蛋撻皮大約1 oz 重), 壓在撻模內
蛋漿:
1. 用火煮溶砂糖, 待涼....雞蛋+淡奶拌勻 , 加入糖水後不停攪勻
2. 用隔篩, 隔2-3次蛋漿, 令蛋漿滑身.....
倒蛋漿入撻模內至9成滿, 以400度焗17分鐘, 然後轉到450 度焗4分鐘至熟透, 完成!
Note: 因應每個焗爐火力不同, 要自己睇火!


新鮮出爐蛋撻!


Sunday, July 25, 2010

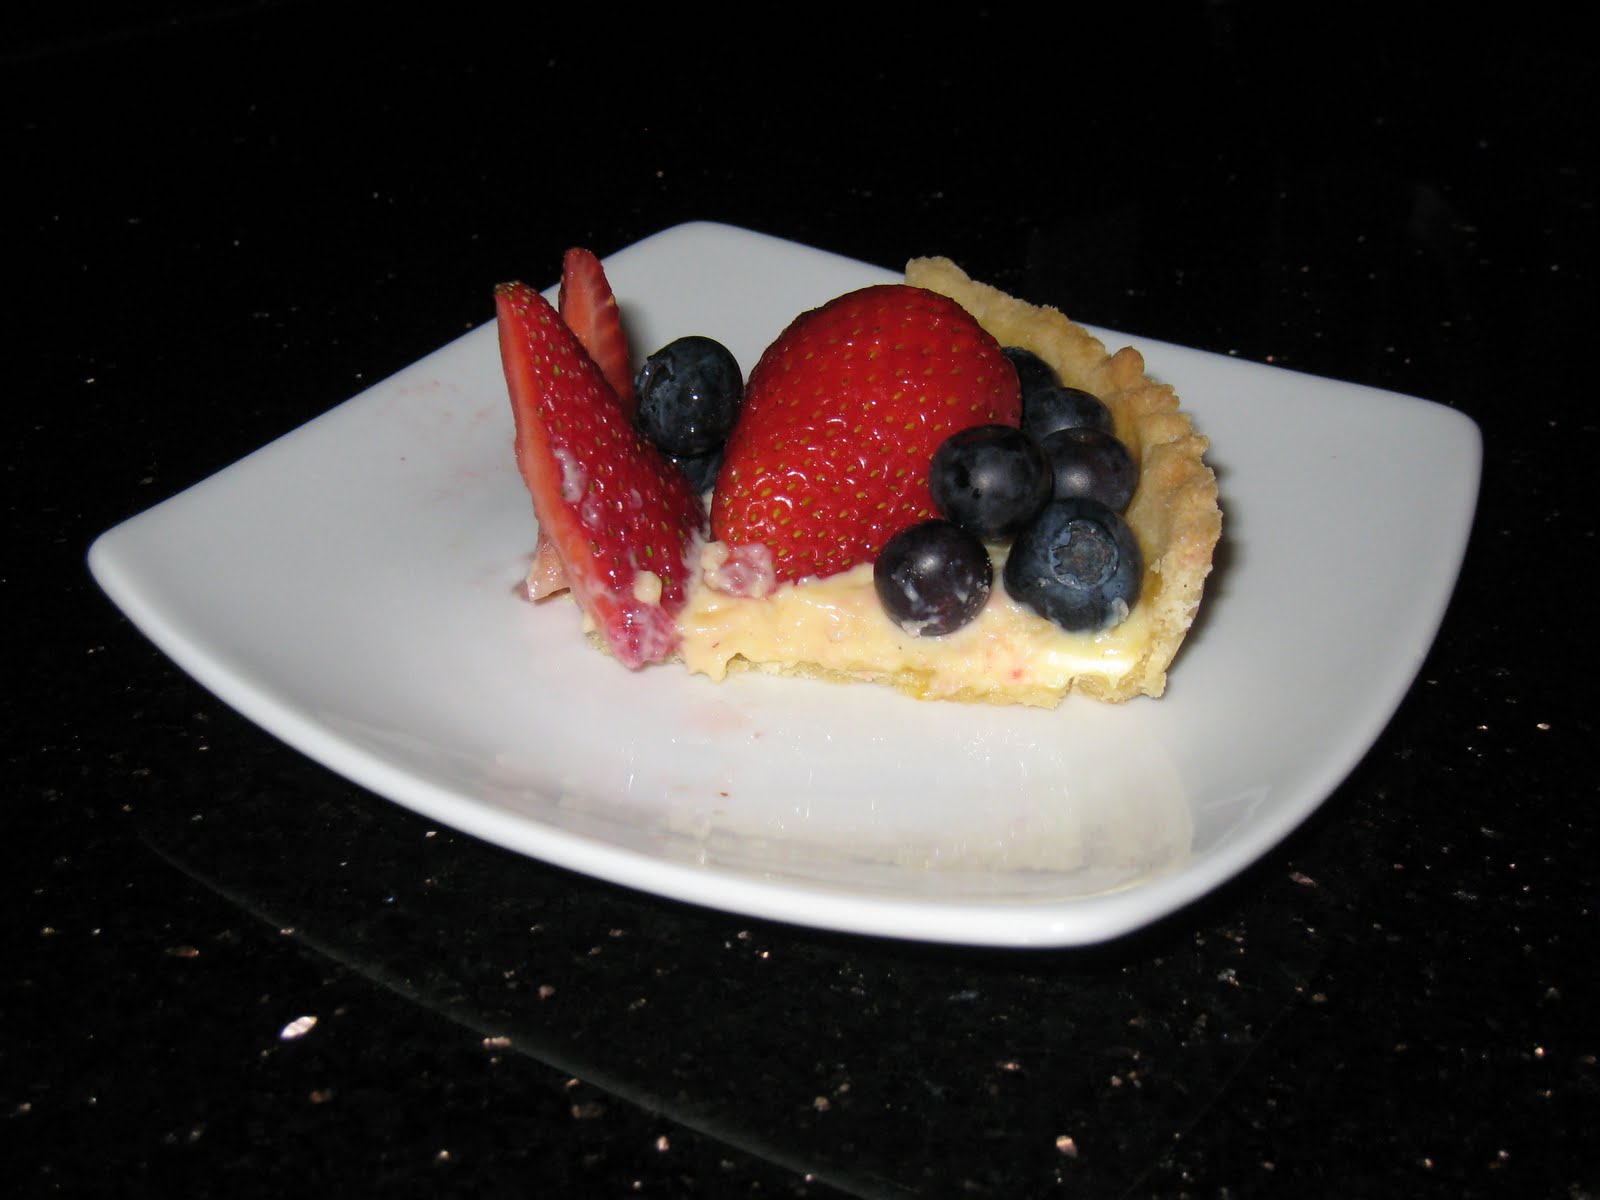
Summer Fruit Tart

California summer is blessed with fresh fruits. Among abundance of which, my favories are blueberries and strawberries. They not only taste great by itself, but go so well in fruit tarts. I love summer fruit tarts. I love the buttery and crunchy crust, the light custard fillings, and most importantly, the eye catching fruits! Last weekend, I made my first attempt baking this favorie dessert. It's, by far, the most difficult dessert I've made. I still can't graspt the technique in making the pastry crust. It tasted a bit too hard instead of tender and crunchy. I did some research online and found out that this is a very common problem for first time bakers. Because of its high butter content, rolling out the dough w/o breaking it into crumbs is extremely difficult. I think it will take several round of live practice and I vouch to get it right!


Anyways, despite the pastry crust not being too successful, the rest of the tart tasted pretty good. I especially like the pastry cream from this recipe:

Ingredients:


Sweet pastry crust
1 1/2 cups (195 grams) all purpose flour
1/8 teaspoon salt
1/2 cup (113 grams) unsalted butter
1/6 cup (35 grams) granulated white sugar
1 large egg, lightly beaten
Pastry Cream:
1 1/4 cups (300 ml) milk
1/2 vanilla bean, split lengthwise
3 large egg yolks
1/6 cup (35 grams) granulated white sugar
¼ cup (40 grams) all-purpose flour
Apricot Glaze:
1/2 cup (125 grams) apricot jam or preserves
1 tablespoon water
Topping:
Blueberries and strawberries, or other mixed fruits of your choice


Sweet Pastry Crust:
1. In a separate bowl, sift or whisk together the flour and salt.
2. Place the butter in your mixer and beat until softened. Add sugar and beat until light and fluffy. Gradually add the beaten egg, beating just until incorporated. (Do not over mix or the butter will separate and lighten in color.)
3. Add flour mixture all at once and mix just until it forms a ball. (Do not over mix or the pastry will be hard when baked.) Flatten the pastry into a disk, cover with plastic wrap, and refrigerate for 40 minutes or until firm.
4. Have ready a tart pan (I used a smaller tart pan, around 5’’ so this recipe actually made two tart) .
5. On a lightly floured surface, roll out the pastry into an circle that is about 1/8 inch (3 mm) thick. To prevent the pastry from sticking to the counter and to ensure uniform thickness, keep lifting up and turning the pastry a quarter turn as you roll (always roll from the center of the pastry outwards to get uniform thickness). I also used parchment paper at the bottom to prevent the sticking. To make sure it is the right size, take your tart pan, flip it over, and place it on the rolled out pastry. The pastry should be about an inch larger than pan.
6. When the pastry is rolled to the desired size, lightly roll pastry around your rolling pin, dusting off any excess flour as you roll. Unroll onto top of tart pan. Never pull pastry or you will get shrinkage (shrinkage is caused by too much pulling of the pastry when placing it in the pan). Gently lay in pan and with a small floured piece of pastry, lightly press pastry into bottom and up sides of pan. Roll your rolling pin over top of pan to get rid of excess pastry. With a thumb up movement, again press dough into pan. Roll rolling pin over top again to get rid of any extra pastry. Prick bottom of dough (this will prevent the dough from puffing up as it bakes). Cover and refrigerate for 20 minutes to chill the butter and to rest the gluten.
7. Preheat oven to 400 degrees F and place rack in center of oven. Line unbaked pastry shell with parchment paper or aluminum foil. Fill tart pan with pie weights, rice or beans, making sure the weights are to the top of the pan and evenly distributed over the entire surface. Bake crust for 20 to 25 minutes until crust is dry and lightly golden brown. Remove weights and cool crust on wire rack before filling.

Pastry Cream:
1. In a medium-sized stainless steel bowl, mix the sugar and egg yolks together with a spoon. (Never let the mixture sit too long or you will get pieces of egg forming.) Sift the flour and then add to the egg mixture, mixing until you get a smooth paste. Set aside.
2. Meanwhile, in a saucepan combine the milk and vanilla extract on medium heat until boiling. (The milk will foam up to the top of pan when done, so watch carefully.) Remove from heat and add slowly to egg mixture, whisking constantly to prevent curdling. (If you get a few pieces of egg (curdling) in the mixture, pour through a strainer.)
3. Place the egg mixture back into a medium saucepan and cook over medium heat until boiling, whisking constantly. When it boils, whisk mixture constantly for another 30 - 60 seconds until it becomes very thick and it is hard to stir.
4. Remove from heat and pour into a clean bowl and immediately cover the surface with plastic wrap to prevent a crust from forming. Cool. If not using right away refrigerate until needed, up to 3 days. Beat before using to get rid of any lumps that may have formed.
Apricot Glaze:
Heat the apricot jam or preserves and water (if using) in a small saucepan over medium heat until liquid (melted). Remove from heat and strain the jam through a fine strainer to remove any fruit lumps. Let cool until it is only slightly warm.

To Assemble Tart:
1. To remove the tart from the pan gently
2. Spread a thin layer of apricot glaze or melted chocolate over the bottom and sides of tart to prevent the crust from getting soggy. Let the glaze dry between 20 - 30 minutes.
3. Spread the Pastry Cream into the tart, filling about 3/4 full. Level with an offset spatula.
4. To decorate the tart you will need 2 to 3 cups (480 - 620 ml) of mixed fresh berries. Prepare the fruit by gently washing and drying. The strawberries will need to be sliced also. Arranging the fruit on the tart can be done either randomly or in concentric overlapping circles, starting at the outside edge. Try to cover all the pastry cream with fruit so that no pastry cream is showing through.
5. After arranging the fruit, rewarm the glaze, if using, and gently brush a light coat on the fruit. The idea is to make the fruit look shiny. If not serving immediately, refrigerate. Take out about 30 minutes before serving to give the fruit and cream a chance to warm to room temperature.



Recipe Source: http://joyofbaking.com/FruitTart.html
Note: the basic recipes came from the above source. As for all my cooking, the recipes I included here are modified based on my family and friends’ taste bug.

Monday, July 12, 2010

Beef Lasagna


Lasagna is one of my favorite pasta dishes and also has been long sitting on my "to-cook" list. Lasagna is one of those dishes you can cook only when you have friends/family over for dinner because it's usually made in large portion! And yes, it takes a long time to cook too. This past weekend, after watching the World Cup final, Vin, Ju, Ca came over to my house which made it the perfect chance for a lasagna night!


This dish took almost 4 hours to cook from start (grounding the beef) to finish (eating) -_-! All the time spent was worth it when the end product turned out super delicious!

The recipe I found online it's so easy to follow and delicious. So I thought to share with you all. Again, I modified the recipe (e.g I skipped the italian sausage) a bit to match my crew's taste bug.

Ingredients
1 1/2 pound of ground beef
1/2 cup of chopped onions2 cloves of garlic chopped
1 (28 ounce) can of crushed tomatoes, or 2 (14.5 ounce) can
2 (8 ounce) cans of tomato sauce
1 (6 ounce) cans of tomato paste
1/2 Cup of Water
2 tablespoons white sugar
1 teaspoon fennel seed
2 teaspoons fresh Basil leaves chopped
4 tablespoons fresh Italian parsley chopped
1 teaspoon salt (or 1.5 teaspoon salt if no Italian Seasoning)
1 teaspoon Italian Seasoning
1/2 teaspoon ground pepper
23 ounces of ricotta cheese (I used low fat)
1/2 teaspoon fresh grated nutmeg
1 egg
1 pound shredded mozzarella cheese
1 cup grated Parmesan cheese
12 Lasagna Noodles
Directions
1. Start with the following in a pot.1 1/2 pound of ground beef1/2 cup of chopped onions2 cloves of garlic chopped
Brown the ground beef, Italian sausage, onions and garlic in a pot until they start to look. It takes about 6 to 9 minutes to brown the meat. I use a medium temperature to brown the meat.
2. Add the following:1 (28 ounce) can of crushed tomatoes1 (8 ounce) cans of tomato sauce1 (6 ounce) cans of tomato paste1/2 cup of water
Gently stir this into the cooking meat.
3. Add the following:2 tablespoons white sugar1 teaspoon fennel seed2 teaspoons fresh Basil leaves chopped2 tablespoons fresh Italian parsley chopped1 teaspoon salt1 teaspoon Italian Seasoning1/2 teaspoon ground pepper
Gently stir these seasoning into the sauce.Cover the pot and let the meat sauce simmer. Simmer on low heat for 1 hour and 30 minutes
4. Soak 12 lasagna noodles. The lasagna noodles need to be soaked in hot tap water for 30 minutes.
5. While the noodles are soaking you can make the cheese filling. Put the following in a mixing bowl:23 ounces of ricotta cheese.1/2 teaspoon fresh grated nutmeg Grate fresh nutmeg over the Ricotta cheese.
6. Add the following1 egg2 tablespoons fresh Italian parsley choppedMix these ingredients together with a spoon
7. Now we start building the lasagna layers.Use a 9×13 inch baking pan. Spread 2 Cups of meat sauce on the bottom of the pan.Remove your lasagna noodles out of the water bath. Shake water off wet noodles.Lay 6 noodles across the layer of sauce.Spread half of the ricotta cheese mixture over the layer of noodles.Spread 1/2 of the mozzarella cheese over the ricotta layer.Sprinkle half of the Parmesan cheese over the mozzarella layerSpread 2 cups of meat sauce over the cheese layerLay down the next layer of noodlesSpread the remaining ricotta mixture over noodlesSpread the mozzarella and Parmesan cheeses saving some cheese for the top of the lasagnaPut the last layer of meat sauce on the cheesesSprinkle the remaining cheese on top.
8. Cover with foilBake in preheated oven at 350 for 25 minutesRemove foil and bake uncovered for another 25 minutes.Remove from oven and allow to cool for approximately 15 minutes.

This recipe will feed around 10-12 people. The 4 of us only managed to finished about 1/3 last night. The rest went to our packed lunch for work the next day :)my only piece left after packing lunch

Recipe source: http://mylasagnarecipe.com/
Note: recipe herein has been modified.