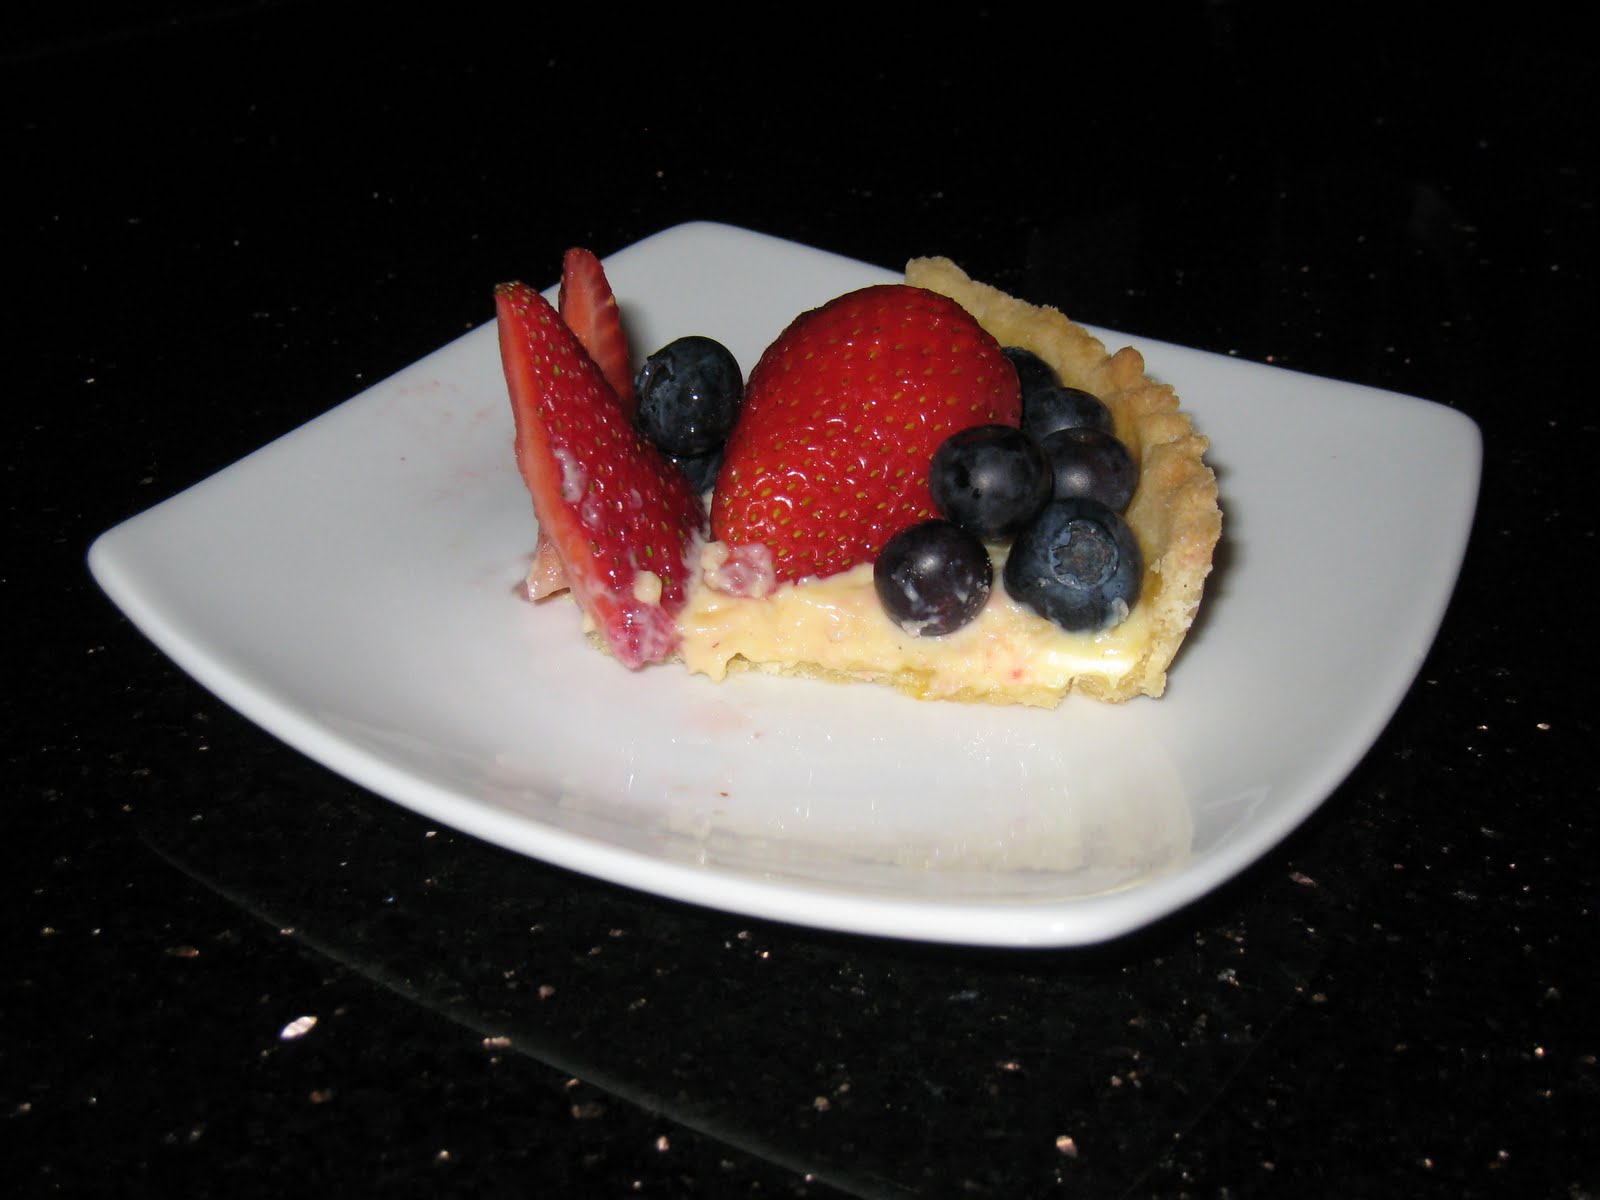
 California summer is blessed with fresh fruits. Among abundance of which, my favories are blueberries and strawberries. They not only taste great by itself, but go so well in fruit tarts. I love summer fruit tarts. I love the buttery and crunchy crust, the light custard fillings, and most importantly, the eye catching fruits! Last weekend, I made my first attempt baking this favorie dessert. It's, by far, the most difficult dessert I've made. I still can't graspt the technique in making the pastry crust. It tasted a bit too hard instead of tender and crunchy. I did some research online and found out that this is a very common problem for first time bakers. Because of its high butter content, rolling out the dough w/o breaking it into crumbs is extremely difficult. I think it will take several round of live practice and I vouch to get it right!
Anyways, despite the pastry crust not being too successful, the rest of the tart tasted pretty good. I especially like the pastry cream from this recipe:
Ingredients:
Ingredients:
Sweet pastry crust
1 1/2 cups (195 grams) all purpose flour
1/8 teaspoon salt
1/2 cup (113 grams) unsalted butter
1/6 cup (35 grams) granulated white sugar
1 large egg, lightly beaten
Pastry Cream:
1 1/4 cups (300 ml) milk
1/2 vanilla bean, split lengthwise
3 large egg yolks
1/6 cup (35 grams) granulated white sugar
¼ cup (40 grams) all-purpose flour
Apricot Glaze:
1/2 cup (125 grams) apricot jam or preserves
1 tablespoon water
Topping:
Blueberries and strawberries, or other mixed fruits of your choice
Sweet Pastry Crust:
1. In a separate bowl, sift or whisk together the flour and salt.
2. Place the butter in your mixer and beat until softened. Add sugar and beat until light and fluffy. Gradually add the beaten egg, beating just until incorporated. (Do not over mix or the butter will separate and lighten in color.)
3. Add flour mixture all at once and mix just until it forms a ball. (Do not over mix or the pastry will be hard when baked.) Flatten the pastry into a disk, cover with plastic wrap, and refrigerate for 40 minutes or until firm.
4. Have ready a tart pan (I used a smaller tart pan, around 5’’ so this recipe actually made two tart) .
5. On a lightly floured surface, roll out the pastry into an circle that is about 1/8 inch (3 mm) thick. To prevent the pastry from sticking to the counter and to ensure uniform thickness, keep lifting up and turning the pastry a quarter turn as you roll (always roll from the center of the pastry outwards to get uniform thickness). I also used parchment paper at the bottom to prevent the sticking. To make sure it is the right size, take your tart pan, flip it over, and place it on the rolled out pastry. The pastry should be about an inch larger than pan.
6. When the pastry is rolled to the desired size, lightly roll pastry around your rolling pin, dusting off any excess flour as you roll. Unroll onto top of tart pan. Never pull pastry or you will get shrinkage (shrinkage is caused by too much pulling of the pastry when placing it in the pan). Gently lay in pan and with a small floured piece of pastry, lightly press pastry into bottom and up sides of pan. Roll your rolling pin over top of pan to get rid of excess pastry. With a thumb up movement, again press dough into pan. Roll rolling pin over top again to get rid of any extra pastry. Prick bottom of dough (this will prevent the dough from puffing up as it bakes). Cover and refrigerate for 20 minutes to chill the butter and to rest the gluten.
7. Preheat oven to 400 degrees F and place rack in center of oven. Line unbaked pastry shell with parchment paper or aluminum foil. Fill tart pan with pie weights, rice or beans, making sure the weights are to the top of the pan and evenly distributed over the entire surface. Bake crust for 20 to 25 minutes until crust is dry and lightly golden brown. Remove weights and cool crust on wire rack before filling.
Pastry Cream:
1. In a medium-sized stainless steel bowl, mix the sugar and egg yolks together with a spoon. (Never let the mixture sit too long or you will get pieces of egg forming.) Sift the flour and then add to the egg mixture, mixing until you get a smooth paste. Set aside.
2. Meanwhile, in a saucepan combine the milk and vanilla extract on medium heat until boiling. (The milk will foam up to the top of pan when done, so watch carefully.) Remove from heat and add slowly to egg mixture, whisking constantly to prevent curdling. (If you get a few pieces of egg (curdling) in the mixture, pour through a strainer.)
3. Place the egg mixture back into a medium saucepan and cook over medium heat until boiling, whisking constantly. When it boils, whisk mixture constantly for another 30 - 60 seconds until it becomes very thick and it is hard to stir.
4. Remove from heat and pour into a clean bowl and immediately cover the surface with plastic wrap to prevent a crust from forming. Cool. If not using right away refrigerate until needed, up to 3 days. Beat before using to get rid of any lumps that may have formed.
Apricot Glaze:
Heat the apricot jam or preserves and water (if using) in a small saucepan over medium heat until liquid (melted). Remove from heat and strain the jam through a fine strainer to remove any fruit lumps. Let cool until it is only slightly warm.
To Assemble Tart:
1. To remove the tart from the pan gently
2. Spread a thin layer of apricot glaze or melted chocolate over the bottom and sides of tart to prevent the crust from getting soggy. Let the glaze dry between 20 - 30 minutes.
3. Spread the Pastry Cream into the tart, filling about 3/4 full. Level with an offset spatula.
4. To decorate the tart you will need 2 to 3 cups (480 - 620 ml) of mixed fresh berries. Prepare the fruit by gently washing and drying. The strawberries will need to be sliced also. Arranging the fruit on the tart can be done either randomly or in concentric overlapping circles, starting at the outside edge. Try to cover all the pastry cream with fruit so that no pastry cream is showing through.
5. After arranging the fruit, rewarm the glaze, if using, and gently brush a light coat on the fruit. The idea is to make the fruit look shiny. If not serving immediately, refrigerate. Take out about 30 minutes before serving to give the fruit and cream a chance to warm to room temperature.

Recipe Source: http://joyofbaking.com/FruitTart.html
Note: the basic recipes came from the above source. As for all my cooking, the recipes I included here are modified based on my family and friends’ taste bug.
Note: the basic recipes came from the above source. As for all my cooking, the recipes I included here are modified based on my family and friends’ taste bug.

 my only piece left after packing lunch
 Recipe source:
